Friday, July 29, 2011

Braised Chicken with Mushrooms and Chestnut

I have never been a fan for chestnuts. I know a lot of people loves to eat that. My mum can cook very nice braised chicken with mushrooms and chestnuts. I would eat the chicken and mushrooms and leave the chestnuts for my other family members. I know my mum spend quite some time to take out the skin and the red thingy of the chestnuts. When I was young, I used to help my mum do that. And I really don't like the job. Perhaps that's why I don't like to eat chestnuts ;p.  

That day I was watching my fav taiwan cook show 吃饭皇帝大again. And they are teaching how to cook this dish. What caught my attention is they are using the packet roasted chestnuts (those that are eaten as tidbits) to cook this dish! Hmm what a good idea. It saves the time to prepare the chestnuts which I hate to do and the tidbit chestnuts are already pretty delicious. 

I must say I am pretty lucky in buying groceries. Whenever I feel like cooking something special, I would managed to get it in the supermart in Chinatown. The packet roasted chestnut just pop up in a corner near the cashier! Da da I must cook this dish than! 

Surprisingly, I love the chestnuts in this dish! It's soft with a little charcoal BBQ taste. And it matches very well with the mushrooms and chicken. It tasted better with this ready cooked chestnuts perhaps because of the roasted taste and it's fuss free! Will definitely cook this dish again!

Ingredients:
1) 1 packet of roasted chestnuts
2) 10 medium size dried mushrooms cut into half (Soaked in water to soften the dried mushrooms)
3) 1 to 2 Skinless chicken thigh meat cut into chunks (depends on the size of the chicken thigh)
4) 3 garlic minced
5) 5 slices of ginger
6) 1 stalk of spring onion cut into half
7) 1 tablespoon of oyster sauce
8) 1 tablespoon of soya sauce
9) 1 tablespoon of Shao Xing wine
10) Pepper
11) Corn starch
12) A few pieces of crystal sugar
13) Water used to soak the mushrooms

Marinate for chicken:
1) 1 tablespoon of oyster sauce
2) 1 tablespoon of soya sauce
3) 1 tablespoon of Shao Xing wine
4) Pepper
5) Corn starch

Steps:
1) Marinate the chicken with oyster sauce, soya sauce, wine, pepper and corn starch.
2) Heat some oil in the pan, add in the garlic, ginger, spring onion and stir fry for a while.
3) Add in the mushroom and stir fry until you can smell the fragrance of the mushrooms.
4) Add in the chicken. Lay it in one layer on the pan. Let the chicken cook on the pan for a while until it turns a bit browned. Browned the other side of the chicken.
5) Add in the chestnuts. Than add in the oyster sauce and soya sauce. Stir fry all the ingredients with the sauces.
6) Add in the shaoxing wine, water and sugar. 
7) Cover the pan with a lid and let it simmer for around 5 minutes.
8) Take the lid away and let it simmer for another few minutes so that the sauces reduces a bit.
9) If you find that it is too watery, you can add in some corn starch mixture to thicken it.


PS: You can add in some dried scallops if you want a richer taste. You can add in hot water to soak the scallops. When they are soft, break it into pieces. Add in the scallops in step 5. The water for soaking the scallops can be added together with the mushroom water. 

Thursday, July 28, 2011

Bean Sprouts and roast chicken salad with thyme

Ever since my doctor tell me to eat more greens and protein less carbo to control my blood sugar, I have salad almost everyday for lunch. I just stock up my fridge with fresh greens, cucumber, tomatoes,lemons, limes and I just grab whatever I feel like eating and come up with a simple salad dressing to go with the veggies.

Yesterday my neighbour just gave me a big plate of bean sprouts which she has grown herself! Wow very organic! Must not let those go to waste. I decided to add it to my lunch salad. My fridge ran out of green veggies, therefore I just grab whatever I have left in the fridge to come up with my salad. And I have just bought some thyme just nice to invent a new salad with that ;p

And this is the outcome of my so call invention
First of all, I found a chicken breast in my freezer.  I thawed it to make my roast chicken. In order to have juicy chicken breast meat, buy those with skin and bones intact. Marinate it with olive oil, salt, black pepper, and roast chicken seasoning in a bottle(optional).  Than bake it in the preheated oven of around 200 degree C for around 30 to 40 minutes. Take the chicken out from the oven and cover it with aluminum foil until it is cool enough for you to cut it into chunks. I took off the skin for a healthier meal.
My roasted chicken breast
Next the veggies. I can only find cucumber, tomatoes, celery and lemons in my fridge. Therefore I cut the cucumber and tomatoes into cubes. And than i add in the raw bean sprouts. If you mind the raw taste of the bean sprouts you can cook it in hot water for a while. I minced my all time favourite garlic and shallots and add into the salad too. Than I sprinkle a little little bit of thyme on top. Ok my veggie part is done.
The veggies
Now left with the salad dressing. I add juice of half a lemon, some balsamic vinegar, ponzu dressing, black pepper and sesame oil into a bowl and mix them well. Give it a taste. if you find it too salty add some sugar.  My dressing is done!

Add the chicken chunks into the veggie and pour the dressing on top of the salad. Mix the them well and I am done with my simple lunch! yummy!

Wednesday, July 27, 2011

Steam cod fish with crispy bean bits 豆酥鳕鱼

In my previous blog on homemade soya bean milk, I have mentioned that I have made use of the blended soya beans left overs to make 豆酥. My first attempt to make it is pretty successful. It turn out not too salty and I have added some kick to it by adding dried chillies. Since it tasted quite nice, I have confidence in making it again when I make my 3rd round of soya bean milk. Than I won't feel so bad in throwing away the soya beans after squeezing out the juice. And I can save some money too! One small bottle of 豆酥 is pretty expensive. Though my home made version is not as yummy as the ones sold in supermarket, but it is cheaper and not so oily. Those sold are covered in a layer of oil!

I managed to get some cod fish at a discounted price and it is just perfect for making this steam cod fish with crispy bean bits(豆酥鳕鱼). For making this dish I have referred to this Chinese website http://blog.xuite.net/sdhmnguk/blog/31785589?ref=rel. I have added some ingredients in making the 豆酥 though.

Ingredients:
1) Pulp from blended soya beans after squeezing out the juice (豆渣)
2) Chilli bean sauce (豆瓣酱)
3) Soya sauce
4) 2 to 3 Dried Chillies
5) Chopped garlic
6) Oil

Steps:
1) Pour olive oil onto the soya bean pulp and try to coat the pulp with the oil.
2) Spread the pulp evenly on a baking tray and put it in the oven and bake it at 150 to 160 degree C for roughly 40 minutes. You will have to toss the pulp halfway through the cooking time in order to cook evenly. You might have to vary the cooking time. As long as it has turned slightly brown and a bit crispy(only very slightly) you can take it out
3) Add in some oil into the pan, when the oil is slightly hot, add in the garlic and dried chillies and stir fry until you smell the fragrance of the garlic.
4) Add in the bean sauce and soya sauce and stir fry for a while. Pour in the toasted crispy bean pulp and mix well with the seasonings.
5) Stir fry with low fire until the bean pulps turn golden brown.

Now it's turn to cook the cod fish with the cooked crispy bean bits.

Ingredients:
1) Cod fish
2) Crispy Bean bits
3) Soya sauce
4) Scallions
5) Ginger
6) Oil

Steps:
1) Steam the cod fish with ginger and scallion.
2) Heat some oil in a pan and stir fry the crispy bean bits until they become more crispy.
3) When the cod fish is done. Pour the crispy bean bits on top of the cod fish.
4) Heat soya sauce (you can add in some water if you find it too salty) in the microwave or on the pan until it simmers and pour the mixture onto the cod fish.


南乳罗汉斋

南乳斋是我妈妈新年必煮的菜。超爱南乳的味道,香极了!不过,不是每个人都喜欢它的味道。我先生就是其中一位。上次为了做虾酱鸡翅,买了一大罐南乳,结果还剩很多。休斯顿唐人街的超市好难买到小号的东西,他们都卖一大包不然就是特大号的东西。小家庭的我,买什么东西特别是调味料和干粮都要想清楚买了会不会常用。不然买回去用一两次就放在冰箱里,不但占位也很浪费。

为了快点“解决”这罐南乳,想起妈妈煮的南乳斋。不过,我不想买这么多菜煮一大盘斋,两个人一定吃不完(是的,这里卖的菜也是一大包)。所以,我就买了罗汉斋的罐头,里面的分量刚好。我只需要买绍菜(天津白菜)就可以了!如果你喜欢南乳,可以放多点,斋的颜色就会红一点,味道也浓一点。我先生不太喜欢南乳的味道,所以我只放了一点。如果你不想放南乳当然也可以啦,那就是一道简单的罗汉斋了:)

食材:
1 绍菜半个
2 一罐罐头罗汉斋
3 南乳 一块
4 蒜蓉一汤匙
5 油少许
6 水少许

步骤:
1)将油倒入锅中把蒜蓉爆香。
2)加入南乳,把它压碎炒香。
3)加入绍菜炒一下。
4)加入罐头罗汉斋(包括罐头里的汁)翻炒一下。
5)如果你喜欢多一点汁,可以加入一点水。如果你觉得南乳很咸,可以加一点糖。
6)盖锅盖焖大概5分钟,就可以盛盘。


Monday, July 25, 2011

榨菜蒸肉丝


又突然想起妈妈曾煮过的一道简单的菜。只需要两种基本材料--榨菜和猪肉。还蛮喜欢吃榨菜的。只要加入少许的榨菜在汤中或者拿它炒肉,整道菜就很“惹味(广东话)”。妈妈用它来蒸肉片,我家婆用它来煮汤。反正我买了榨菜做这道菜,还剩下好多,所以决定帮我老公一解妈妈菜肴的味道,我这星期就煮我家婆的榨菜汤。所以如果你想知道如何做榨菜汤就“敬请期待”咯!
我妈妈是将榨菜及猪肉切成片。但我觉得切片的话太大片了,吃一两片可能就觉得有点多。因此,我就把肉片和榨菜片切成条状。由于榨菜蛮咸的,所以我用糖先把它腌一腌。我也选择了夹心肉,因为这个部位的肉有点油脂,煮出来不会太柴,太硬。这道菜你也可以选择用炒的,但我实在太懒了不想开锅炒得厨房油腻。而且蒸的话,也比较健康。

食材:
1)榨菜一个切成条状
2)夹心肉切成条状
3)姜汁少许
4)蒜末少许
5)糖少许
6)酱油少许
7)蚝油少许
8)麻油少许
9)花雕酒少许
10)胡椒粉少许
11)太白粉少许


步骤:
1)用一点糖抓一抓榨菜。
2)将姜汁,蒜末,酱油,蚝油,麻油,花雕酒,胡椒粉加入肉里,搅拌均匀。然后才加入太白粉搅拌均匀。让它腌大概半小时。
3)把榨菜和夹心肉搅拌均匀,放在盘子里用大火蒸大概15 至20分钟或至猪肉熟透为止。

皮蛋炒潺菜

那天到唐人街的超市看到一种看似熟悉的菜。印象中这种菜煮后会变成软软黏黏的,有点像秋葵。妈妈好像用它,肉片和咸蛋来煮汤。不过,我想用它来炒。我记得以前在新加坡的餐馆吃过上汤炒豆苗及咸蛋和皮蛋。我决定也“复制”这道菜,不过是用潺菜和只用皮蛋(因为邻居做给我的咸蛋包粽子用完了)。
我不可能为了这道菜熬上汤。我就用买回来的罐头上汤。煮出来的味道当然没有餐馆的味道来得鲜甜,不过我还是满意我的“成果” ,味道还可以啦 ;p

食材:
1)潺菜
2)皮蛋切丁
3)蒜蓉
4)姜片3片
5)上汤半碗
6)开水半碗

步骤:
1)热锅把油倒入爆香蒜蓉和姜片。
2)将潺菜放入锅中炒一下。
3)放入皮蛋炒一下。
4)加入上汤和开水。
5)等到上汤再次滚开就可以上菜了。

Wednesday, July 20, 2011

Spicy baked Cod Fish

Doesn't this look a bit like the BBQ stingray?! Well how I wish it is. Really miss the BBQ stingray and the La La or gong gong..... and so much more! Well since I can't have that, I will try another way to satisfy my craving. This recipe actually comes from Seasaltwithfood (http://www.seasaltwithfood.com/
2010/11/spiced-roasted-cauliflower-and-potatoes.html) Her recipe is used for cauliflower and potato. 

I am pretty bored with steaming cod  fish therefore I have decided to try this way for cooking this fish. I must say I really love it! Though not as shiok as the BBQ stingray but it did satisfy my craving for the spicy stingray. Next time I will buy banana leaves and place the fish on it and baked it. If I have a BBQ pit I think it will be even more wonderful to BBQ the fish inside the banana leaves.  

Ingredients:
1) Cod Fish (any fish like snapper or even stingray will be good too)
2) 2 Tbsp Curry Powder
3) 1 tsp Garam Masala
4) 2 tsp chilli powder
5) 2 tsp minced garlic 
6) 1 Tbsp minced ginger 
7) 2 tsp of minced onion
8) 1 tsp Sea Salt
9) ¼ Big Lime, juiced
10) 3 to 4 Tbsp Canola Oil
11) 2 Sprigs Fresh Curry Leaves (optional)
Directions:
1) Combine and mix all the seasonings well.
2) Spread a layer of the seasoning on the aluminum foil. Than place the cod fish on top. Spread the remaining of the seasoning on top of the fish.
3) Seal the foil and put it on a baking tray lined with foil. Place the tray in a preheated oven (around 200 degree C) for about 15 to 20 minutes.

Home Made Soya Bean Milk without the Soya Bean Milk machine

That day I was watching "冰冰好料理" and they are featuring how to make soya bean milk without using the soya bean milk machine! All you need is a blender! I was very delighted cos I have a blender which is sitting in my kitchen cabinet. I think I am pretty sua gu about this way of making soya bean milk. When I tell my neighbour and my friends, they seem to know it already haha! 

Recently, I am trying to eat everything natural as much as possible. This recipe just fit the bill. 1 bag of soya beans can make lot's of soya bean milk and it is definitely cheaper than buying soya bean milk in the supermarket. I have a packet of organics soya bean at home anyway, so I must give it a try. Since I can't take sugar and sweet stuff I did not add any sugar. But it taste equally good! I have made it twice. The first time I followed http://www.noobcook.com/soy-bean-milk/ 's recipe which has added panda leaves. Maybe because the panda leaves I had are frozen ones that's why I don't think it make much difference to whether I add or don't. It has a little bit of pandan fragrance. The second time I have decided not to add. And I prefer the soya bean milk this time because I can really taste the soya beans and the fragrance of it. Now I have a 2 litres of soya bean milk in my fridge, I can have it anytime I like. I have a lot of soya beans leftovers after squeezing out the juice. I have thrown them away the 1st time. I think it is wasting food.  Luckily I managed to find a recipe of using it to make 豆酥。豆酥is more commonly used in making 豆酥鳕鱼. 1 bottle of 豆酥is pretty expensive. Now I can make myself! I will post the recipe next time. 

My next target is making tou huay(豆花)without using 石膏粉. Hmm let me do some research and I will tell you my results in my later post after I have tried to make my tou huay. 

Ingredients:
1) 1 cup of soya beans (the cup here refers to the measuring cup for rice)
2) Approximate 1 litre of water 

Tools:
1) Blender
2) A cloth filter/muslin bag with fine holes 
3) A sieve

Directions:
1) Wash the soya beans and soak it overnight or around 6 to 8 hours.
2) Pour away the water and wash the beans a few times.
3) Scoop a tablespoon of beans into the blender. Add 300 ml of water and blend it together. (my ratio is 1 tablespoon to 300 ml of water)
4) Do it a few times until you finished blending the beans.
5) Pour the mixture into the cloth filter and squeeze out the water. I filter the soya bean milk with a sieve again after squeezing out the juices. I put the cloth over the sieve and place the sieve (with the cloth) over the pot 
6) Bring the soya bean milk to a gentle simmer (not boiling or the milk will curd) over medium low heat for about 10 minutes, stirring regularly. After simmering, add sugar to taste and stir until they dissolve. Off the flame.

PS : If you like almond flavour in your soya bean milk. You can add in some 南杏 when you are simmering the soya bean milk. Than you can make 杏仁豆腐with the soya bean milk too isn't it?! :)


Monday, July 18, 2011

Steam Cod Fish with Garlic

Cod fish is another of my favourite fish. It is pretty expensive but I will still buy this on alternate weeks. The fish oil from cod fish is better than salmon. My mum always cook this fish every week. Most of the time she steam it with soya sauce, ginger. I bought some sauce for steaming fish here when I first came to Houston. My sis sent me some more such sauce last year. During my last visit back to Singapore, my dearest colleague Mandy specially drove to buy 广祥泰's steam fish sauce for me. Thanks Mandy very touched!!  Therefore, I always steam cod fish cos it's the easiest way and fail proof haha!

Recently I came across this recipe which uses garlic to steam fish. The thought of garlic taste when I bite into the fish and the sauce also full of the garlic, I tell myself I must try this dish! I just love garlic! 

Ingredients:
1) Cod Fish
2) 8 garlic cloves minced but not too finely.
3) 1/2 packet of 广祥泰's steam fish sauce (or you can use soya sauce)
4) 2 tablespoon of water
5) Some olive oil

Steps:
1) Put aside half the portion of garlic. For the rest of the garlic, put them on the baking tray and toss them with olive oil. Spread them out in the tray and put them in a preheated oven (around 200 degree C) for around 10 to 15 minutes. You must keep a look out once it reached 10 minutes to see if they are turning brown and not burnt. Like mine it is a bit burnt this time so next time I must really keep a look out. You have to take out the tray to toss the garlic around half way through the cooking. Once it is done scoop them out and set aside. Baking the garlic makes it less oily and therefore more healthy. I learnt it in one of the food blog. You can also fry the garlic in a pan which is faster. Or you can also use the microwave to fry the garlic.

2) Put your fish in a plate and sprinkle the roasted garlic and fresh garlic onto the fish. 

3) Mix the steam fish sauce with water and pour the mixture over the fish. You can omit the water if you want your sauce to be more salty. 

4) Put your fish in the steamer and steam for around 10 to 15 minutes depending on the size of your fish.

5) When it is done you can add in some cilantro or spring onion and you can serve this garlicy dish!


Salmon Belly Miso Soup


I remember whenever I go Sushi Tei, I would definitely order their Salmon Belly Soup. My husband also love this soup at first taste. It's been a long time since I go there. Wonder if they still serve that?   Anyway one day I suddenly have a craving for that soup. (probably because I crave for good Jap food, it's so difficult to find a good ramen here) I therefore decided to try to cook my version of this soup based on my memory of how the soup taste.

天助我也, I found my main ingredient, salmon belly being sold in the Chinatown supermarket! Actually I have cooked this soup for a few times, perfecting the taste each time I cook this. I would not say that this time round it taste as good as the one at Sushi Tei, but we are happy with the taste ;) I just love the taste of the salmon belly fat oozing in my mouth when I bite into it! And I don't have to feel guilty about eating it! Salmon belly has the most fat full of omega 3 which is good for the heart. This is really a healthy soup for the whole family.


Ingredients:
1) Salmon belly cut into chunks
2) Half a box of Tou Fu cut into small cubes
3) Seaweed
4) Half of a big onion cut into slices
5) Eniki Mushroom (金针菇)
6) Spring onion
7) 1 table spoon of red,white or yellow Miso
8) 1/2 to 1 tablespoon of Bonito powder
9) 1 table spoon of mirin
10) Sake (optional)

Directions:
1) Bring 5 to 6 bowls of water to boil.
2) Add in all the ingredients.
3) Scoop some of the soup to the miso paste and let the miso dissolve in it before adding it to the soup. This is a very important step. If you just add the miso paste directly into the soup. It will not dissolve so easily and may end up getting burnt in the pot.
4) Add in the other seasonings. You might want to taste the soup first before adding in the bonito powder. This is because some brand's miso might taste more saltish than others. Red miso is the most saltish and white ones are the least saltish. So it depends on how saltish your miso is than you adjust the amount of bonito powder and mirin accordingly.
5) When the salmon belly is cooked you can turn off the fire and serve. Before serving sprinkle some spring onion.


Sunday, July 17, 2011

银鱼洋葱炒蛋 Fried Eggs with White Bait and Onion

又是一道寻找“妈妈的味道”的一道菜。妈妈常用洋葱和虾仁炒蛋。我记得她偶尔也会买银鱼来做香炸银鱼炒花生。然后她会留下一些银鱼用来炒蛋。每次她煮这道菜,我可以就只吃这个炒蛋。

银鱼的味道很鲜甜,用来炒蛋基本上我不会放任何调味料。炒出来的蛋很香,味道也很甜美。银鱼属一种高蛋白低脂肪食品,对高脂血症患者食之亦宜。我加入洋葱让炒蛋增加香气和甜味。


食材:
1)鸡蛋3粒
2)银鱼(一撮,大概手掌般大)
3)半颗洋葱
4)胡椒粉少许

步骤:
1)将鸡蛋打发,然后加入银鱼和胡椒粉搅拌均匀。
2)将油倒入锅中,等油烧热,加入洋葱炒至稍软。
3)倒入蛋液,煎至两面熟透。

我比较喜欢有点焦黄的蛋,这样会比较香。如果你喜欢比较软嫩的蛋,可以加些牛奶进入蛋液,然后炒至刚熟。

Stir fry ladies finger (Okra) with dried shrimps and chilli


Some people don't like to eat slimy vegetables. But I just love them! Brinjals, ladies finger are some of my favourite! When I saw the US supermarkets selling ladies finger, I was shocked! Never knew ang moh likes to eat that. Anyway they don't call it ladies finger they call it Okra. The people here usually cook ladies finger as a stew with other veggies and meat.

Well I know ladies fingers is best cooked with sambal chilli in Singapore. But I have cooked it several times so I am recalling how my mum cooked it other than sambal chilli. I think she has cooked it with dried shrimp. Therefore I will replicate it and add some chilli padi to add some kick. Actually adding chilli also a way of getting rid of so many chilli padi I have at home. As I have mentioned in my earlier post, my husband has been planting chilli padi since last year and we just can't seem to finish the chilli padi at home.

Surprisingly, my husband likes to eat this dish. He is those who don't really like to eat slimy vegetables. But after tasting the ladies finger he says,"hmm not bad!" He is pretty strict in his praise for food which is nice. So "not bad" in his dictionary for praising food means pretty good.  Woo I am so happy!


Ingredients:
1) 15 to 20 small ladies fingers (the supermarket here only sells small ones in a packet which has around 15 to 20 )
2) A handful of dried shrimps
3) 4 to 5 chilli padi cut into small slices.
4) 3 cloves of garlic minced

Steps:
1) Wash the dried shrimps. Than soak the shrimps with boiling water until they are softened. When they are softened, pour away the water. Add some Shaoxing Wine to the shrimps and let them soak for a while.
2) Cut the ladies finger into pieces at a slanted angle.
3) Heat some oil in the pan and when the oil is hot, add in the dried shrimps and stir fry until you can smell the aroma of the Shaoxing wine and the shrimps are dry.
4)  Add in the garlic and stir fry until you can smell the aroma of the garlic. Be careful not to burnt them.
5) Add in the chilli and stir fry for a while.
6) Add in the ladies finger and stir fry until they are soft. If it is too dry you can add some water.
7) Add in some salt to taste.

雪耳黑木耳玉竹汤

休斯顿的天气实在太热了!因此多喝汤水很重要。虽然夏天我每天都会煮一些比较偏凉的汤,如西洋菜、苦瓜汤但是太凉也不好。那天到药材店逛了逛,问了那里的职员夏天可以煮哪些适合夏天但却不会太凉的汤。店员建议我煮雪耳玉竹鸡汤。正好我家里有这些材料不需要特别再买,所以我那天马上回家就煮了这道汤。我还加入黑木耳,因为多吃黑木耳对防止心血管疾病颇有效。雪耳可说是穷人的燕窝。它也富有胶原蛋白对美白和抗老很有帮助。所以喝这道汤可说是一举多得:)上次我煮白果薏米腐竹糖水还剩下一些鹌鹑蛋,我也把他们加入汤里。我依稀记得小时候跟妈妈参加婚宴,总有一道白木耳鹌鹑蛋的汤,好好喝哦。所以我决定加入鹌鹑蛋,“重温旧梦”!不过鹌鹑蛋不可以吃太多因为胆固醇很高哦!

材料:
1)雪耳一朵
2)黑木耳 5 -6 朵
3)红枣8颗
4)枸杞子一把
5)鹌鹑蛋10粒
6)鸡胸肉一块 (鸡腿肉也可以)


步骤:
1)用热水泡软雪耳和黑木耳。雪耳泡软后,把后面黄色硬硬的部分剪掉。
2)鸡肉要用滚水川烫备用。
3)鹌鹑蛋煮熟把壳剥掉备用。
4)将6至8碗水煮开,然后把所有材料倒入锅中。等到水再次煮开,把火转至小火然后煮大概1个半到2个小时。


Friday, July 15, 2011

Baked Thai Style Salmon

This is another simple salmon recipe. Just a few ingredients and you can have a healthy and yummy dish. You can choose to steam this dish too. Or you can change the salmon to other fish like sea bass,red garoupa etc.


My husband like to grow some veggie at home. We have harvested a lot of of chilli padis so we are thinking of how to "get rid of them" in different dishes. So this is a dish perfect for using them ;) Now we are growing calamansi and the asian chillis which we can hardly find in Houston. So far my chillis are finally turning red (after a few months), but the calamansi is growing so so slowly! Can't wait for it to  grow tall and grow fruits so that I can use them for my belachan chilli.  I will post my results for my belachan chilli later.


Ingredients:
1) 1 big salmon fillet
2) 3 to 4 chilli padi (you can reduce or add according to your tolerance for spicyness)
3) 5 to 6 garlic chopped finely.
4) 1 onion chopped finely
5) 1 inch ginger chopped finely
6) some cilantro optional
7) 1 to 2 teaspoon of fish sauce (some brands are more salty so you can reduce accordingly)
8) 1 tablespoon of sugar
9) Juice of 1 medium size lime.
10) Rind of half of the lime


Steps:
1) Pat the fish dry and place it on the aluminum foil.
2) Sprinkle the chilli padi, garlic, onion and ginger over the fish
3) Mix all the seasonings in a bowl until the sugar dissolve than pour it over the fish.
4) Seal the foil and place it in the preheated oven ( around 200 degrees C) for 15 to 20 minutes.
5) Sprinkle the cilantro over the cooked fish than serve.

Tuesday, July 12, 2011

Har Cheong Kai 虾酱鸡翅

Besides KFC, Roast Spring Chicken (skin must be crispy type), my husband love to eat Har Cheong Kai. We used to order this whenever we eat at Zi Char stalls. Just love the crispiness and the aroma of this dish. Since my husband love it so much, I have decided to "pamper" him with this dish. I am not a great chef to experiment this dish therefore I seek the help of the food bloggers again :) This time round I have found 2 ways of cooking this dish. One way is from The Little Teochew(http://www.thelittleteochew.com/2009/05/
shrimp-paste-chicken-har-cheong-kai.html) and the other is from Blogger's Recipe (http://bloggersrecipe.
blogspot.com/2007/11/har-cheong-kai.html). I have decided to try the recipe from The Little Teochew as I still have a big chunk of belachan at home and I don't want to buy fine shrimp sauce just for cooking this dish. My fridge is already full of all types of sauces and my cabinets are also full of cooking stuff, no more space for sauces which I seldom use.

This is the 2nd time I have tried cooking this dish. The 1st time turn out pretty good as in the taste and aroma is there. But as I did not deep fried it (I oven baked it cos as you know I hate the messiness), my husband says not so good as he prefers the crispy type. Therefore this time round since I wanted to pamper him I have decided to deep fry the wings. But I slightly tweaked the recipe by not coating it with flour. Anyway I gave my husband a choice with or without flour and he chose without. Ok the result is crispier than the 1st time but still not as crispy as with flour coated. But my husband says ok so pass this time. I have made another batch which I have oven baked it. This is for me as I want a healthier choice. Turn out to be crispier than the 1st time as I have used the broiler to make the skin browner and crispier. Of cos taste wise the deep fried ones are more yummy.
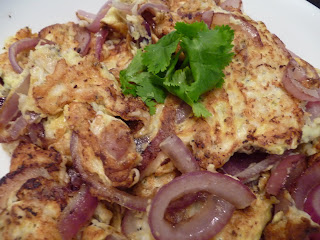
It is actually a simple dish so if you like to eat Har Cheong Kai why not try doing it yourself.

The deep fried ones


Ingredients:
1) 15 Chicken wings (you can use whole chicken or drumlets too)
2) A small piece of belachan slightly toasted
3) 2 piece of Nam Yee (red fermented bean curd, 南乳. Different brands will differ in the saltiness so you can add more or less)
4) Dashes of fish sauce
5) Pepper
6) Shaoxing wine
7) Sesame seed oil

Steps:
1) Wash the wings and pat dry.
2) Put all the wings in a ziploc bag.
3) Crush the belachan and Nam Yee in a bowl. Than add in the other seasonings. You can add in sugar if you find the seasonings too salty. If it is too dry add in some of the  reddishNam yee liquid.
4) Pour all the seasonings into the ziploc bag and give it a good shake to mix well.
5) Leave it in the fridge over night.
6) Use paper towels to pat dry the wings before deep frying.
7) Heat oil till medium hot and deep fry till it turns brown.
The oven baked ones
(If you use the oven. preheat it to 200 degrees C. Brush the wings with olive oil than put them into the oven. Baked it for around 20 minutes than turn on the broiler or grill function and let the skin turn brown. Must watch carefully if not it will get burnt easily)

Bitter Gourd Soup

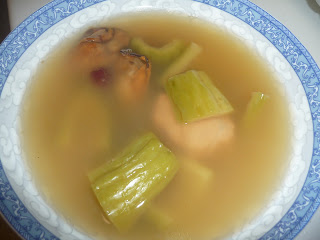
Hot weather needs a cooling soup for the body. According to my mum bitter gourd is cooling for the body. And I just checked that it can stabilize the blood sugar in the body which is just right for me! Therefore it is one of the most common soup I will cook at home. If you are scared of the bitter taste if the bitter gourd, I think after cooking it as soup it is not as bitter as eating it as a dish. The soup also does not taste bitter too!

We have been eating quite a bit of deep fried food for the past few days so I hope by drinking this soup it helps to cool the body down ;p

Ingredients:
1) 1 Bitter Gourd cut into big chunks take off the pith and seeds.
2) 1 small piece of loin meat (you can use pork ribs for soups too)
3) 8 small red dates, remove the seeds
4) 3 big dried oysters

Steps:
1) Blanch the loin meat or pork ribs and set aside.
2) Bring 5 bowls of water to boil than put all the ingredients into the pot.
3) Cover the pot and let it comes to a boil again for 5 minutes. Than lower the flame and let it simmer for 1 1/2 to 2 hours.

Monday, July 11, 2011

Baked Herbal Fish


It's really a headache thinking of how to cook a fish. As I have mentioned in my earlier post, I cook a fish dish almost 3 times a week. I don't like to fry fish because firstly it is rather unhealthy and secondly the whole kitchen will be very oily.  Therefore when I see this recipe from wokkingmum (http://wokkingmum.blogspot.com/2008/06/steamed-herbal-fish.html) I am so happy and excited to try this out.


Anyway I still have a lot of Chinese herbs which I bought to cook herbal soup. I might as well use them to cook this dish! If you like herbal taste this dish is definitely right for you. You can even substitute fish to chicken and you get herbal chicken! I have chosen to bake the fish instead of steaming because I am using the oven to cook another dish so I might as well kill 2 birds with one stone ;p  In other words, I am just lazy lah cos don't need to wash extra utensils haha!


Ingredients:
1) Swai fillets (you can even use salmon. I have tried it and it tasted good too!)
2) 80ml Water
3) 1 tablespoon Shao Xing Wine
4) Salt and pepper to taste
5) 10 pieces of Yu Zhu 玉竹 (Solomon's Seal Rhizome)
6) 6 Hong Zao 红枣 (Red Dates)
7) 8 pieces of Pao Shen or 1 stalk Ren Shen 人参 (Gingseng)
8) 2 sticks of Dang Shen 党参 (Codonopsis Pilosulae)
9) 1 handful of Gou Qi Zi 枸杞子 (Wolfberries)
10) 1 piece of Dang gui 当归 (Chinese angelica)

Directions:
1) Put all herbs with water in a bowl and put into the microwave for about 10 minutes .
2) Put the fish on the aluminum foil and pour the herbs with the water over the fish.
3) Add in the salt, pepper and wine.
4) Seal the foil and put into preheated oven (around 200 degree C) for about 10 to 15 minutes or until the fish is cooked.

三黄蛋----纪念祖母的一道菜


虽然祖母过世十多年,但是我偶尔还是会梦见她。从小妈妈得工作所以我和姐姐都是她带大的。我们和她的感情之浓可想而知。虽然她因为一场意外,造成左腿走路一拐一拐,但是她还是把我们照顾得无微不至。祖母的命很苦。她是个孤儿,从小就和姑
姑漂洋过海道南洋谋生。后来蛮年轻的时候(正好是二战时)又成了寡妇,经常受到别人的白眼。 到了晚年可以享受天伦之乐,没想到80多岁时却中风全身瘫痪。当时,看到她瘦削的身体,整天只能躺在床上,可说是我人生中最煎熬的3年。她经常告诉我们以前生活的艰苦和其他和战争相关的故事。我总觉得她是一个非常坚强的女人。她从不向命运低头,一手带大爸爸和姑姑们。所以我十分敬佩她。那晚,我又梦见祖母。突然间很想念她。我决定煮这道菜纪念她。因为我​小时候她煮这道菜时就会跟我说:“今天加菜,有鸡也有鸭​”。小时候真的以为有鸡肉也有鸭肉,后来才明白原来这道​菜有鸡蛋也有咸鸭蛋,所以有鸡也有鸭!她也会告诉我们这道菜背后另一个故事。当时,祖父过世她一个人带大几个小孩,每天都味三餐烦恼,非常辛苦。有一天,身上没什么钱,不知道要如何应付那天的餐。她掏出仅有的几毛钱叫了爸爸去附近的杂货店买两粒鸡蛋,想做蒸蛋给小孩子吃。爸爸把买回来的蛋交给祖母。祖母一看到那些蛋就觉得不妙。正如她所料,她把蛋打开,马上就传来腐烂的味道。原来,那个不老实的杂货店老板看爸爸是个小孩,把不新鲜的蛋卖给了爸爸。结果,那晚全家人只能吃白饭加酱油为晚餐。每一次她要煮三黄蛋一定会告诉我们这个故事。当然后来生活比较好了,蒸蛋“升级”了,加入了咸蛋和皮蛋。

这道菜非常容易做。可是来到休斯顿,很难买到生咸蛋。就算有,不但不新鲜而且还很贵。很幸运的,我的邻居(她是上海人)找到做咸蛋的食谱,把她做好的咸蛋给我!不过,因为这里买不到鸭蛋,所以那咸蛋是用鸡蛋做的。其实,自己制作咸蛋一点都不难。你也可以自己制作。你只需要高粱酒和盐就可以了!把蛋洗干净抹干。然后用手把蛋放在酒里滚一滚。之后在把蛋放在盐里滚一滚,让盐均匀粘在蛋上。准备一个玻璃瓶,把蛋放入玻璃瓶里放上10多天就可以了。如果你要咸一点,可以放久一点。


食材:
1)1颗咸蛋,蛋黄切成小块
2)1颗皮蛋,切成小块
3)3颗蛋
4)水或高汤
5)盐少许
6)胡椒粉少许
7)麻油少许


步骤:
1)将鸡蛋白和鸡蛋黄打均匀。
2)加入咸蛋及皮蛋。
3)加入半碗至一碗水或高汤。
4)加入盐、胡椒粉及麻油。
5)将所有材料搅拌均匀。
6)把蛋放入蒸笼蒸大概15分钟。